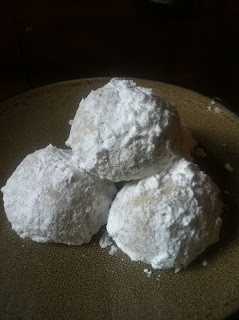
Now, this may come as a shock since I have such a sweet tooth, but as much as I love sweets, I'm not usually a fan of sweets that are just too sugary. I think that's why this is one of my favorite cookie recipes of all time. I love the less sweet tea-style cookies (thumbprint and shortbread cookies are my favs too) and cookies with a bit of salt in them (like my new favorite chocolate chunk cookies).
This recipe comes via Cook's Illustrated, and I don't have any suggestions for improvement, because more often than not their test kitchen is right on the money! If you've never had these before, Mexican wedding cookies go by many different names, all with a similar nutty flavor in a cookie that is so soft it just crumbles away in your mouth. This recipe has just a hint of salt, but combined with a powdered sugar coating they have that wonderful salty/sweet flavor that I can't get enough of.
It's a simple recipe and not very finicky, so it doesn't take a baking expert to get these to come out right. I made two batches yesterday to bring to Finn McCool's weekly cook the competition cooking contest during the Saints game and while the second definitely started with a better butter temperature and the texture of the dough was noticeably different, the end result was virtually the same. I'm always whipping up a few batches during the holidays and it wouldn't be Christmas without these and pralines strewn about the kitchen. I hope you enjoy them as much as I do!
Mexican Wedding Cookies from Cook's Illustrated
makes approximately 50 cookies, depending on size
Ingredients
2 cups whole pecans, chopped fine
2 cups all-purpose flour
3/4 teaspoon table salt
2 sticks unsalted butter (1/2 lb.), softened
1/3 cup superfine sugar
1 1/2 teaspoons vanilla extract
1 1/2 cups powdered sugar (for rolling cooled cookies)
Instructions
- Preheat oven to 325 degrees and adjust oven racks to middle positions.
- Mix flour, salt and half the chopped nuts in medium bowl and set aside. Place remaining chopped nuts in a food processor and pulse 10 to 20 seconds until you get the texture of coarse cornmeal; stir into flour mixture and set aside.
- In bowl of an electric mixer at medium speed or by hand, beat butter and sugar until light and creamy, about 1 1/2 minutes with an electric mixer or 4 minutes by hand, then beat in vanilla. Scrape sides and bottom of bowl with rubber spatula*(this is important), and add flour mixture. Beat at low speed until the dough just begins to come together but still looks scrappy (about 15 seconds). Scrape sides and bottom of bowl again with rubber spatula and continue beating at low speed until dough is cohesive, 6 to 9 seconds longer. Do not overbeat! Working with about one tablespoon dough at a time, roll and shape cookies into balls, crescents, rings, or cigar shapes as desired.
- Bake until tops are pale golden and bottoms are just beginning to brown, turning cookie sheets from front to back and switching from top to bottom racks halfway through baking, 17 to 19 minutes. Cool cookies on sheets about 2 minutes, then remove to a wire rack and cool to room temperature (about 30 minutes). Working with three or four cookies at a time, roll cookies in confectioners’ sugar to coat them thoroughly. Gently shake off excess. Before serving, roll cookies in confectioners’ sugar a second time to ensure a thick coating, and tap off excess. (They can be stored in an airtight container up to 5 days.)
Crumby notes:
- If you can't get superfine sugar, just pulse regular granulated sugar through a food processor for about 30 seconds.
- Historically these cookies have Mideval Arab origins, but they've since been adapted and similar version of them pop up in many different cultures. Some versions use different nuts and they can be shaped differently depending on where they come from. I find the ball shaped versions a bit easier to make, but they can be crescent, ball, cigar or donut shaped.
- When you are shaping them, I like to make sure to use a very light hand so you're not smashing them into whatever shape, but just barely molding how you want them...it helps make sure they melt away in your mouth when you bite into them.
~Happy Baking!~


